

Visualize the user login journey with Asgardeo
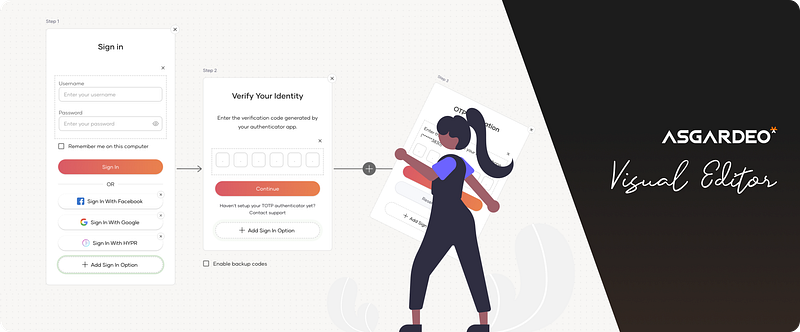
Up until now, Asgardeo offered a login flow customization tool that was user-friendly, and fairly easy to use. But over time, we understood that users that are new to the platform would potentially have a hard time configuring the login flow with the existing offering. So, we’ve listened to your feedback and taken it up a notch to offer a next-level user experience.
Introducing the new login flow Visual Editor for Applications.
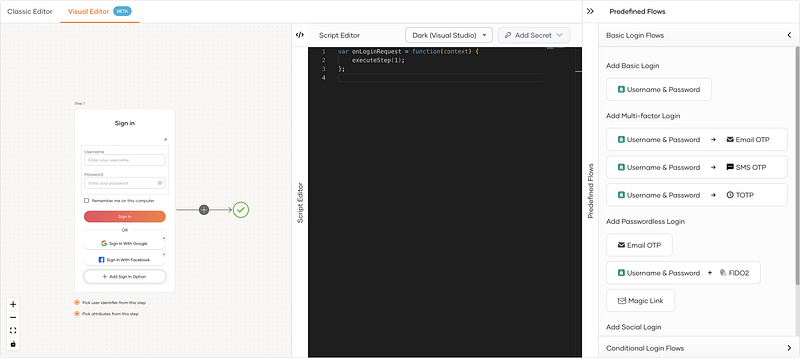
Features ✨
- Intuitive visual nodes to gain a clear insight into the prompts users will encounter during the login flows.
- Enhanced script editor with improved IntelliSense support with a variety of themes to choose from.
- Easily accessible predefined flow templates, both basic and conditional.
Try It Out 🚀
- Go to Asgardeo Console → https://console.asgardeo.io
- Navigate to Applications → Your preferred application
- Switch to the
Sign-in Methodtab. - Change to the
Visual Editor (Beta)section. - Play around 🎡.
Using the
_Try It App_for playing around with different login flows would be the easiest, if you do not have a application with Asgardeo login already setup. Learn more about the try it app from 👉here.
Operations 👨🏽💻
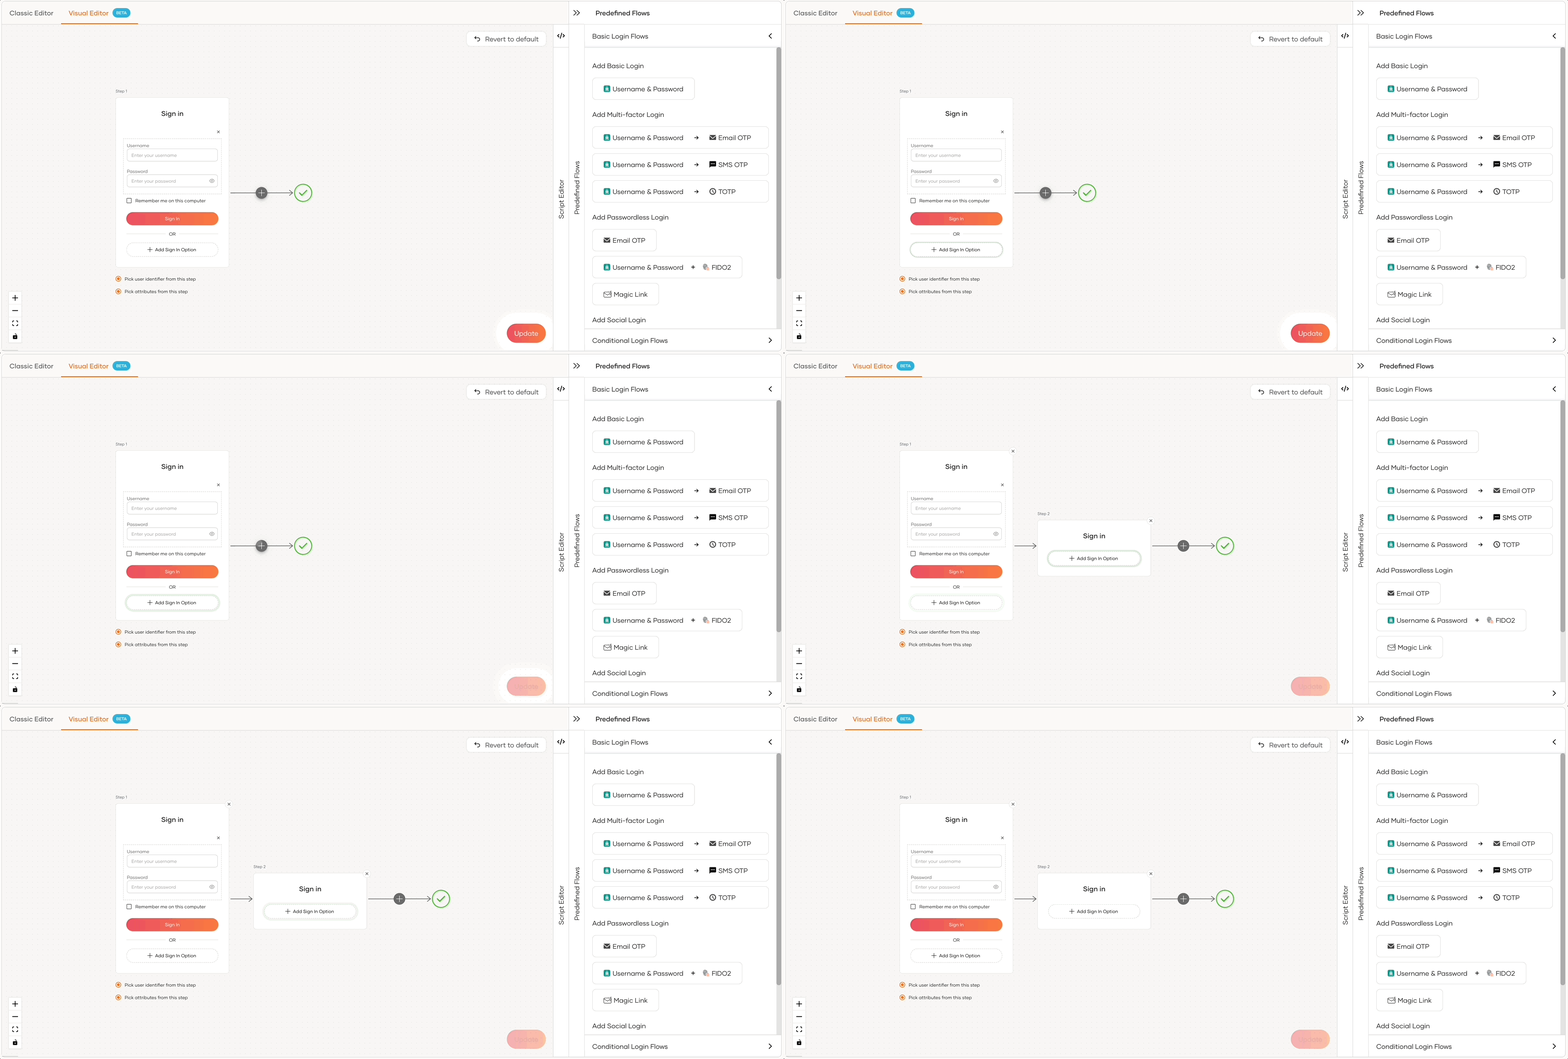
Adding a new step
Use the ➕ button to add new steps to the flow. An empty step will be added to the flow where you can then add the required options.
💡 A step is usually a new prompt in the login flow. The default flow will have one step.
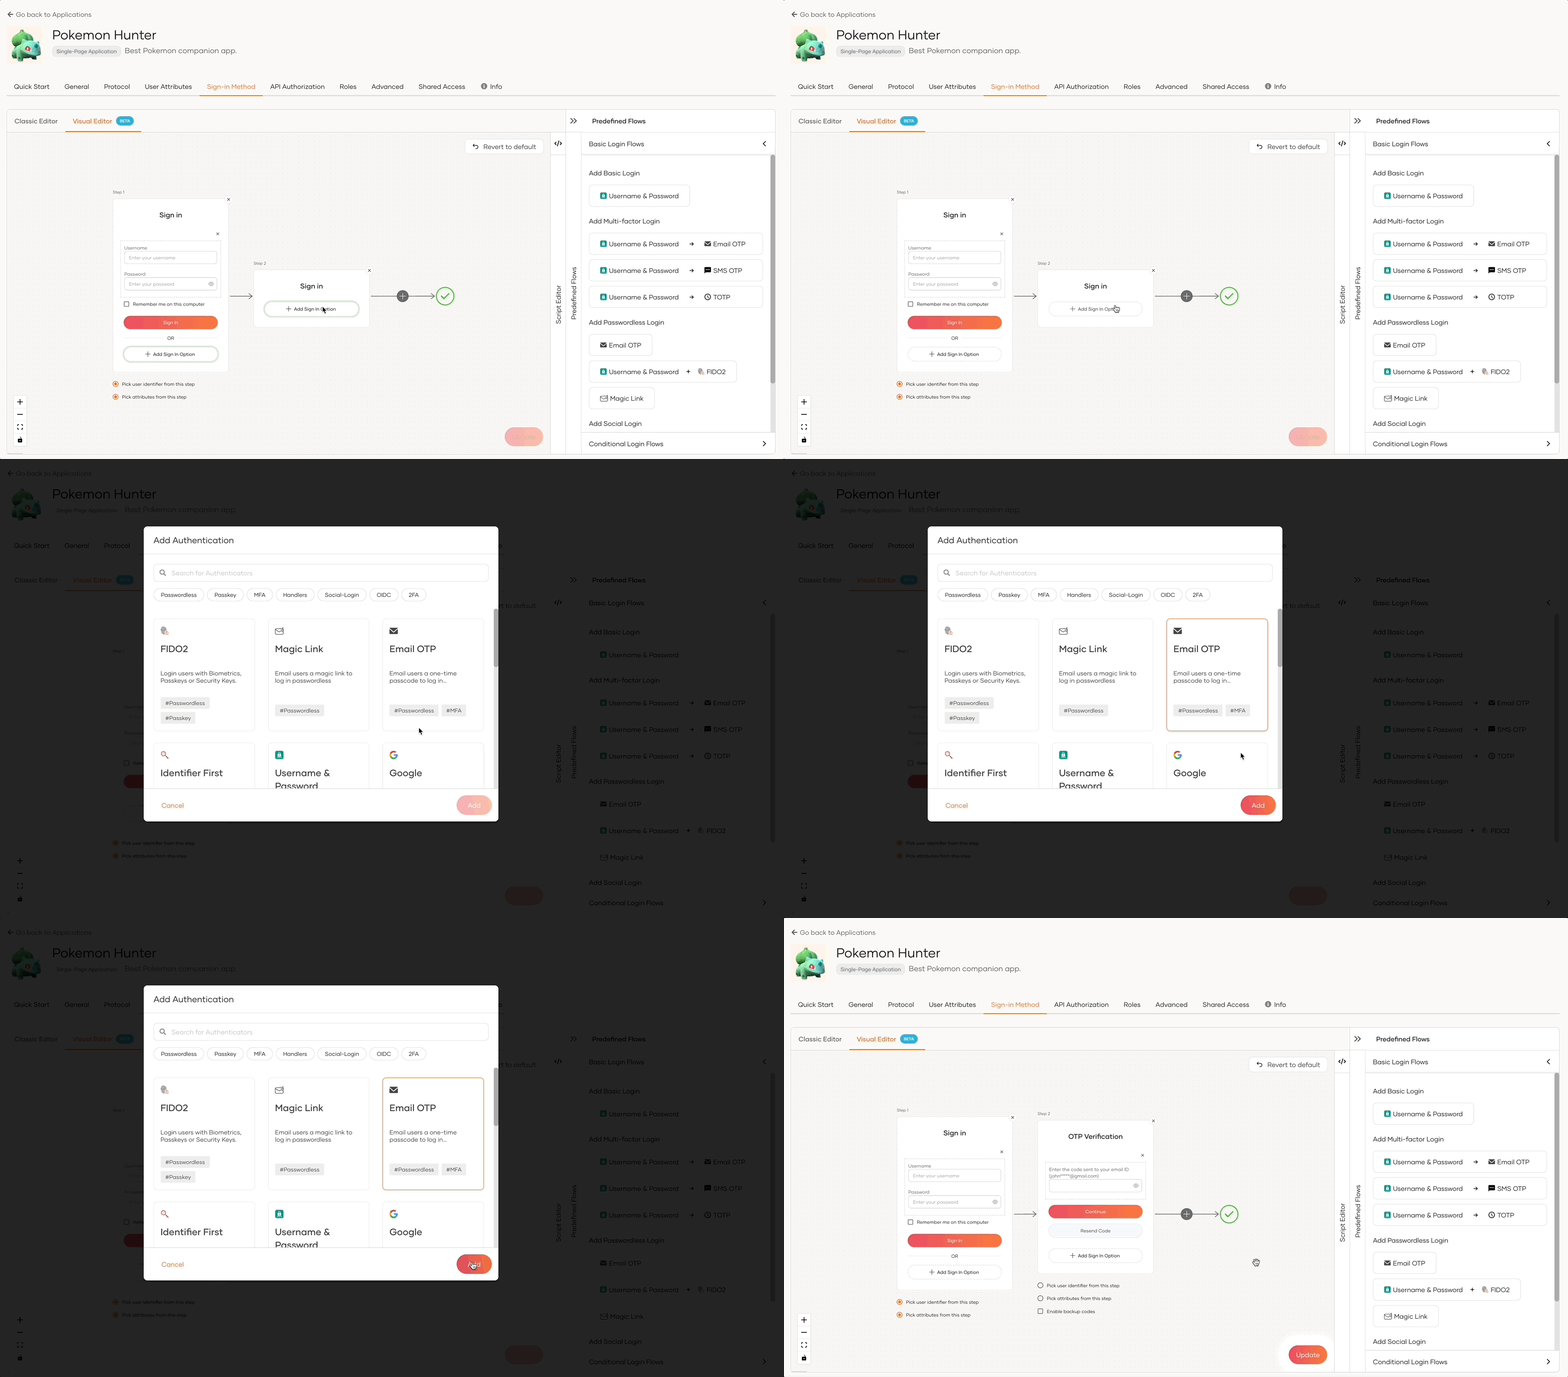
Adding options
To add new login options to a flow, click on the Add Sign In Option button. From the popup modal, select one or multiple options at once to get them added to the step.
💡 Default flow will have one step with Username & Password configured as an option.
Deleting Steps & options
Click on the ❌ button to remove a particular option or a step from the login flow.
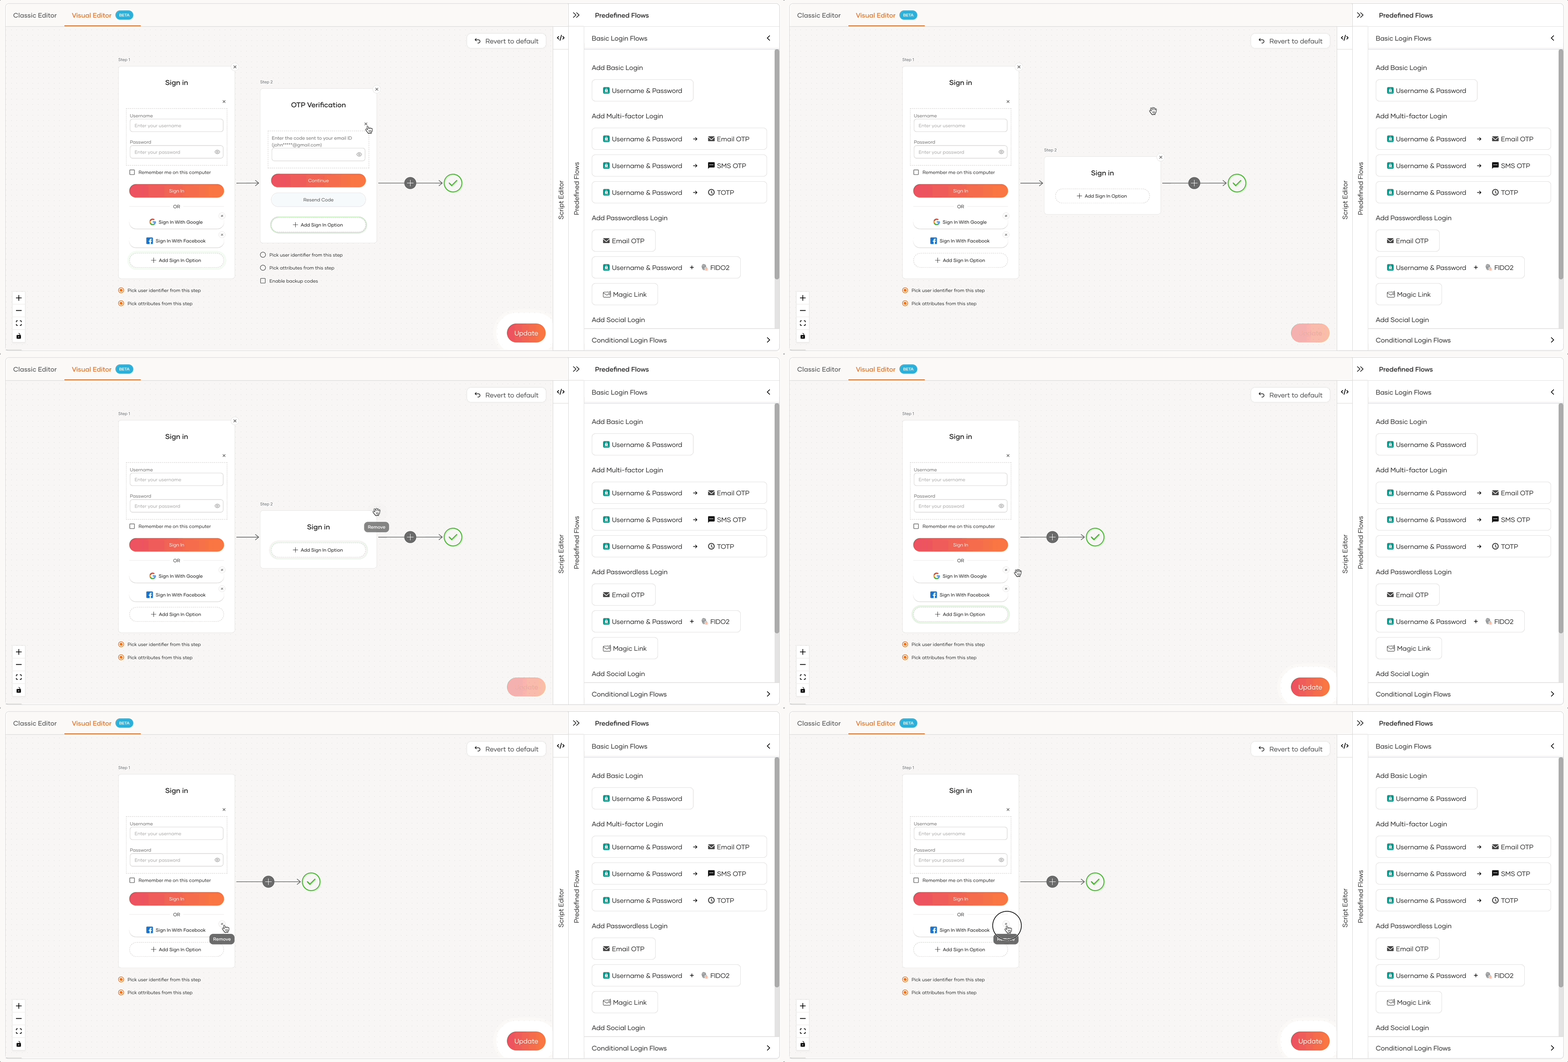
💡 Note that if the login flow only has one step, the delete button will not be visible.
Using Predefined Flows
Basic Login Flows
Open up the Predefined Flows panel and click on any of the common predefined flow templates under Basic Login Flows section to quickly get started.
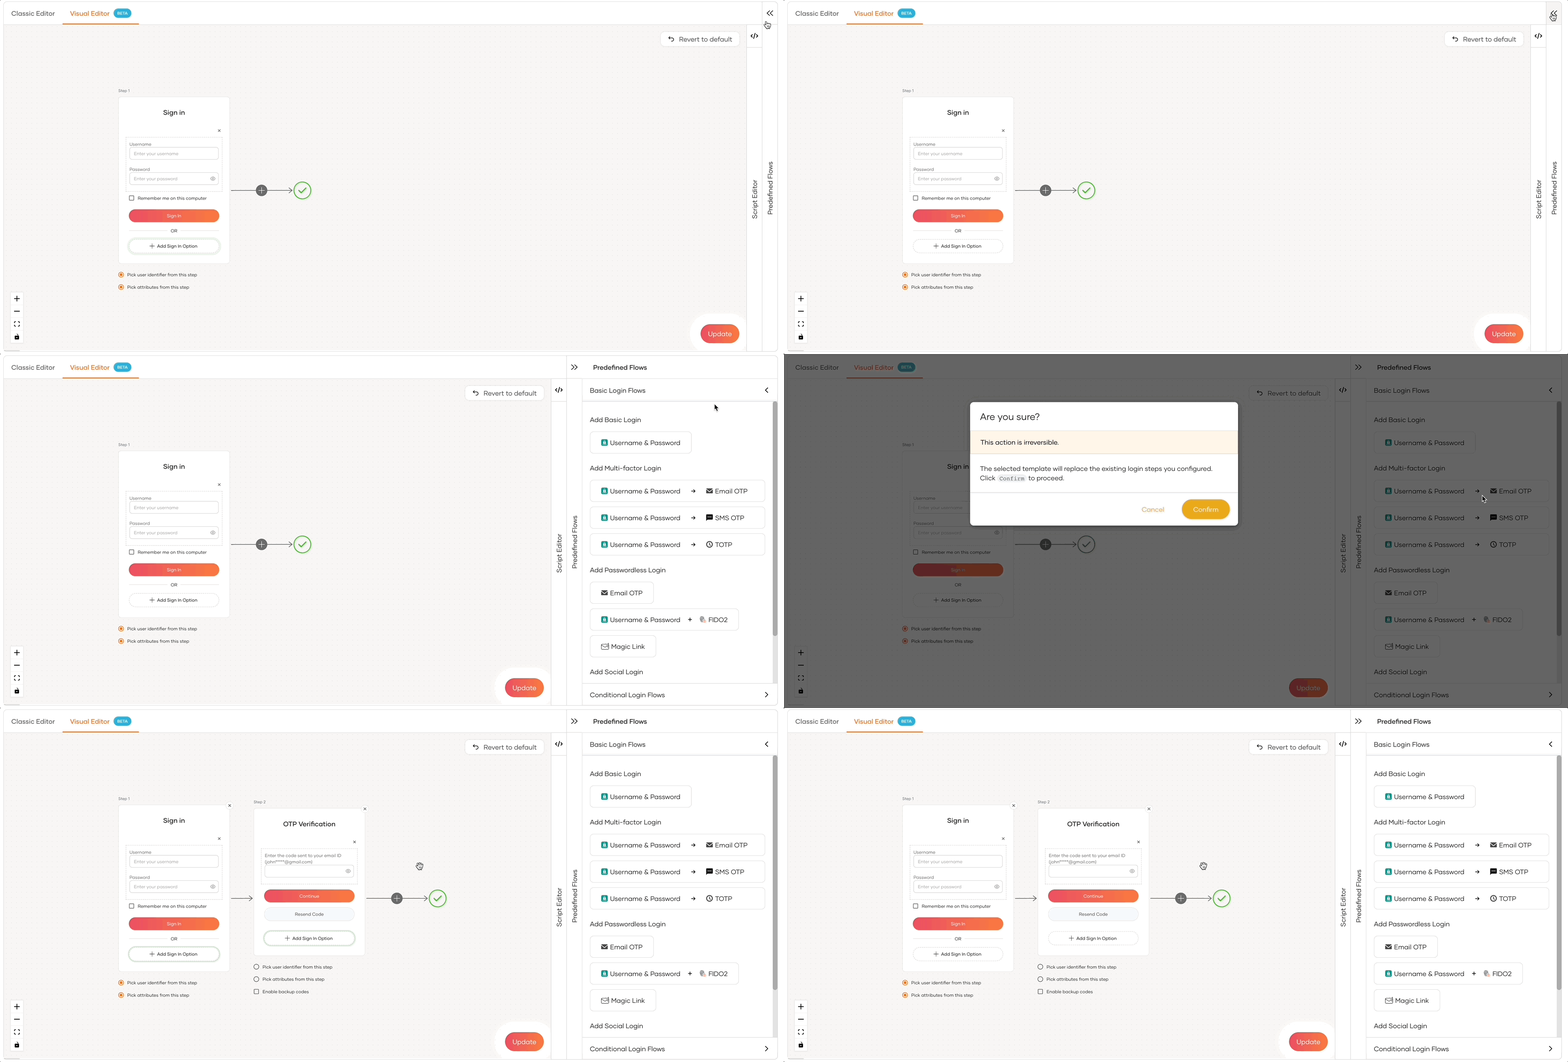
💡 Note that this operation will set the login flow steps based on the selected template and will revert what ever progress you’ve got going.
Conditional Login Flows
Open up the Predefined Flows panel and select any of the templates from the Conditional Login Flows section.
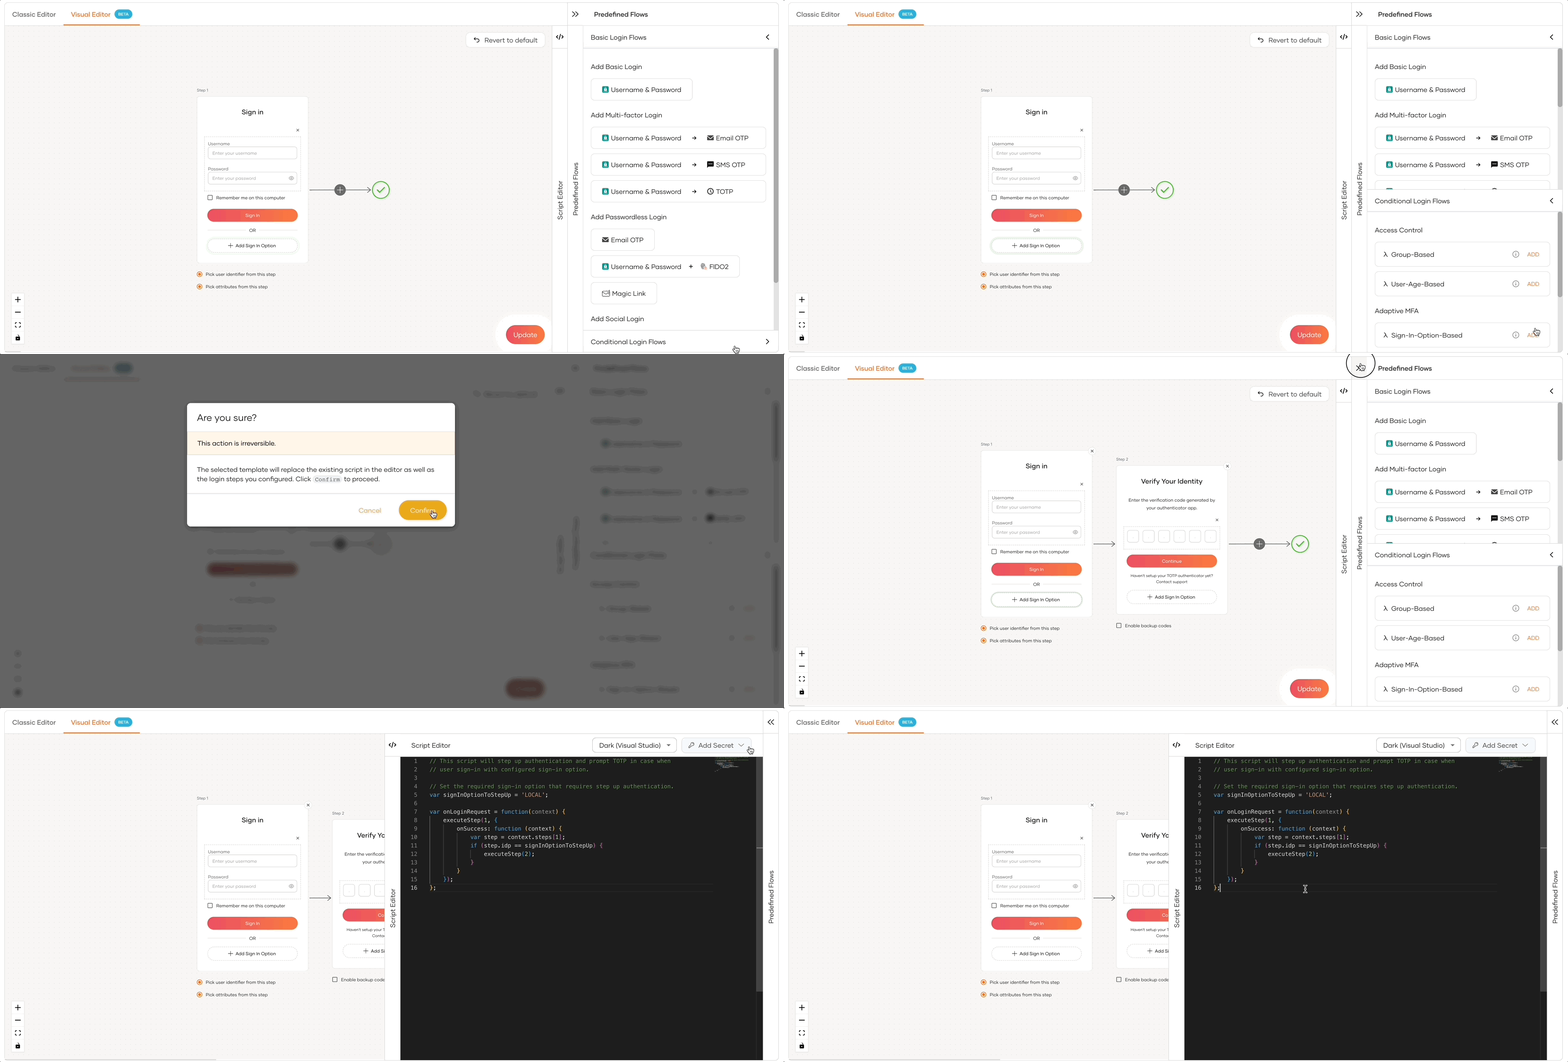
💡 Note that this operation will set the login flow steps & script based on the selected template and will revert what ever progress you’ve got going.
Revert the flow to the default
If you want to revert back to the default flow i.e. single step with Username & Password, click on the Revert to default button.
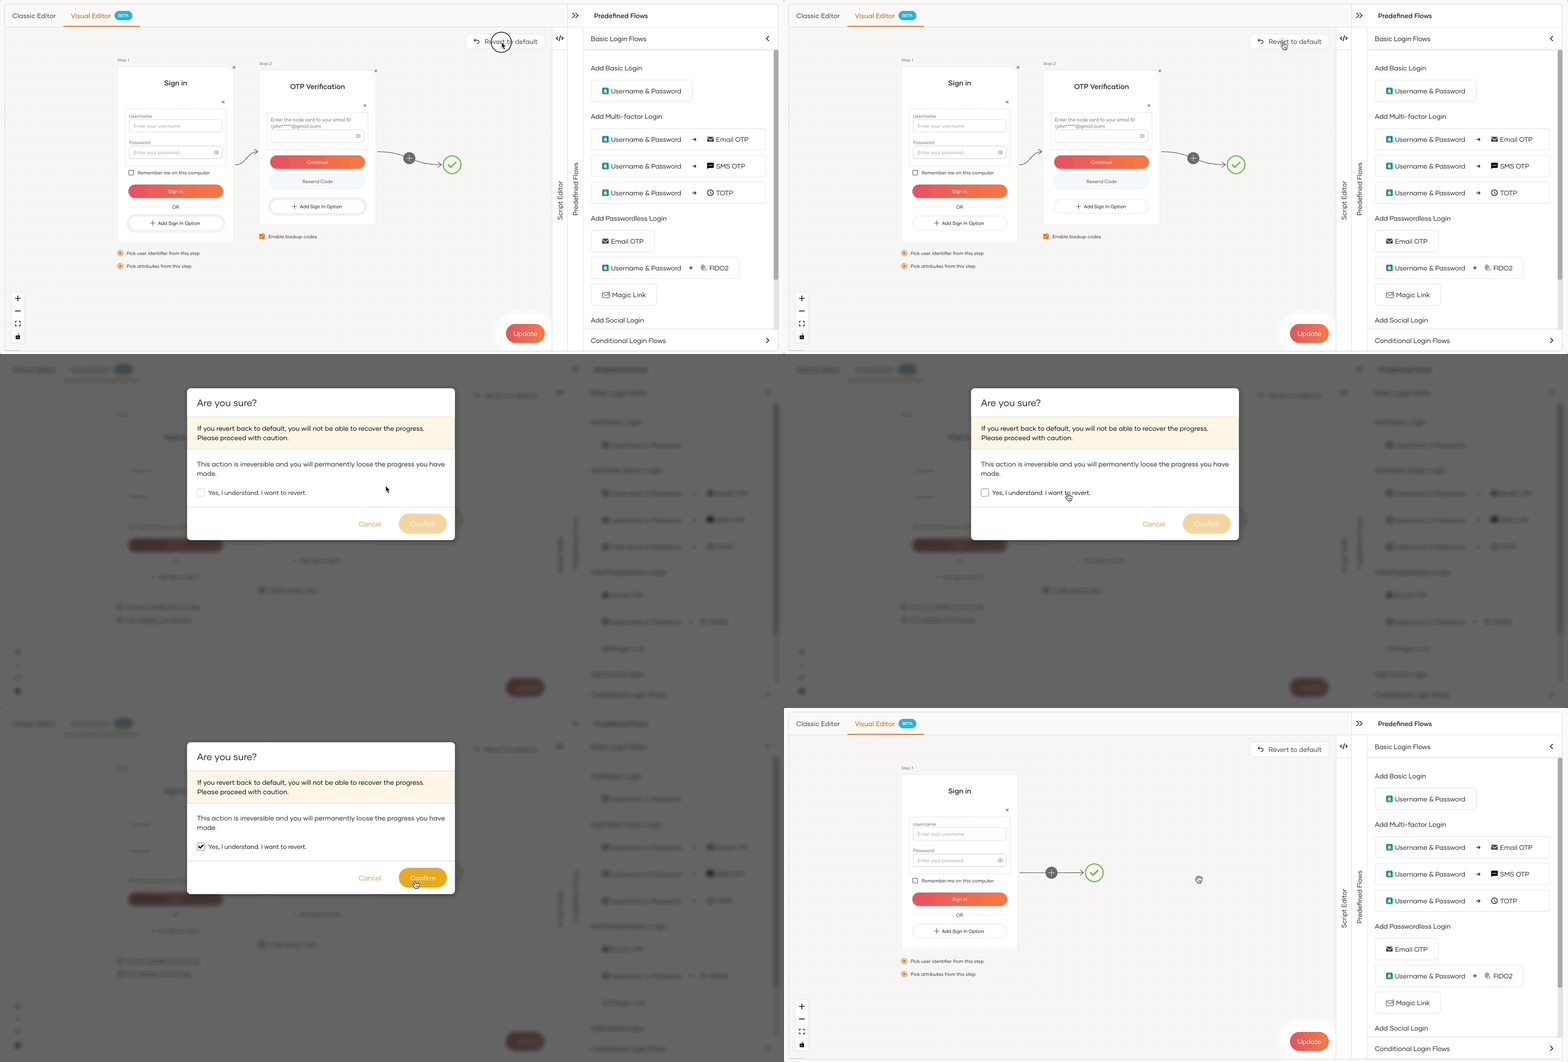
💡 Note that if you do this, there’s no way to recover your previous flow configuration.
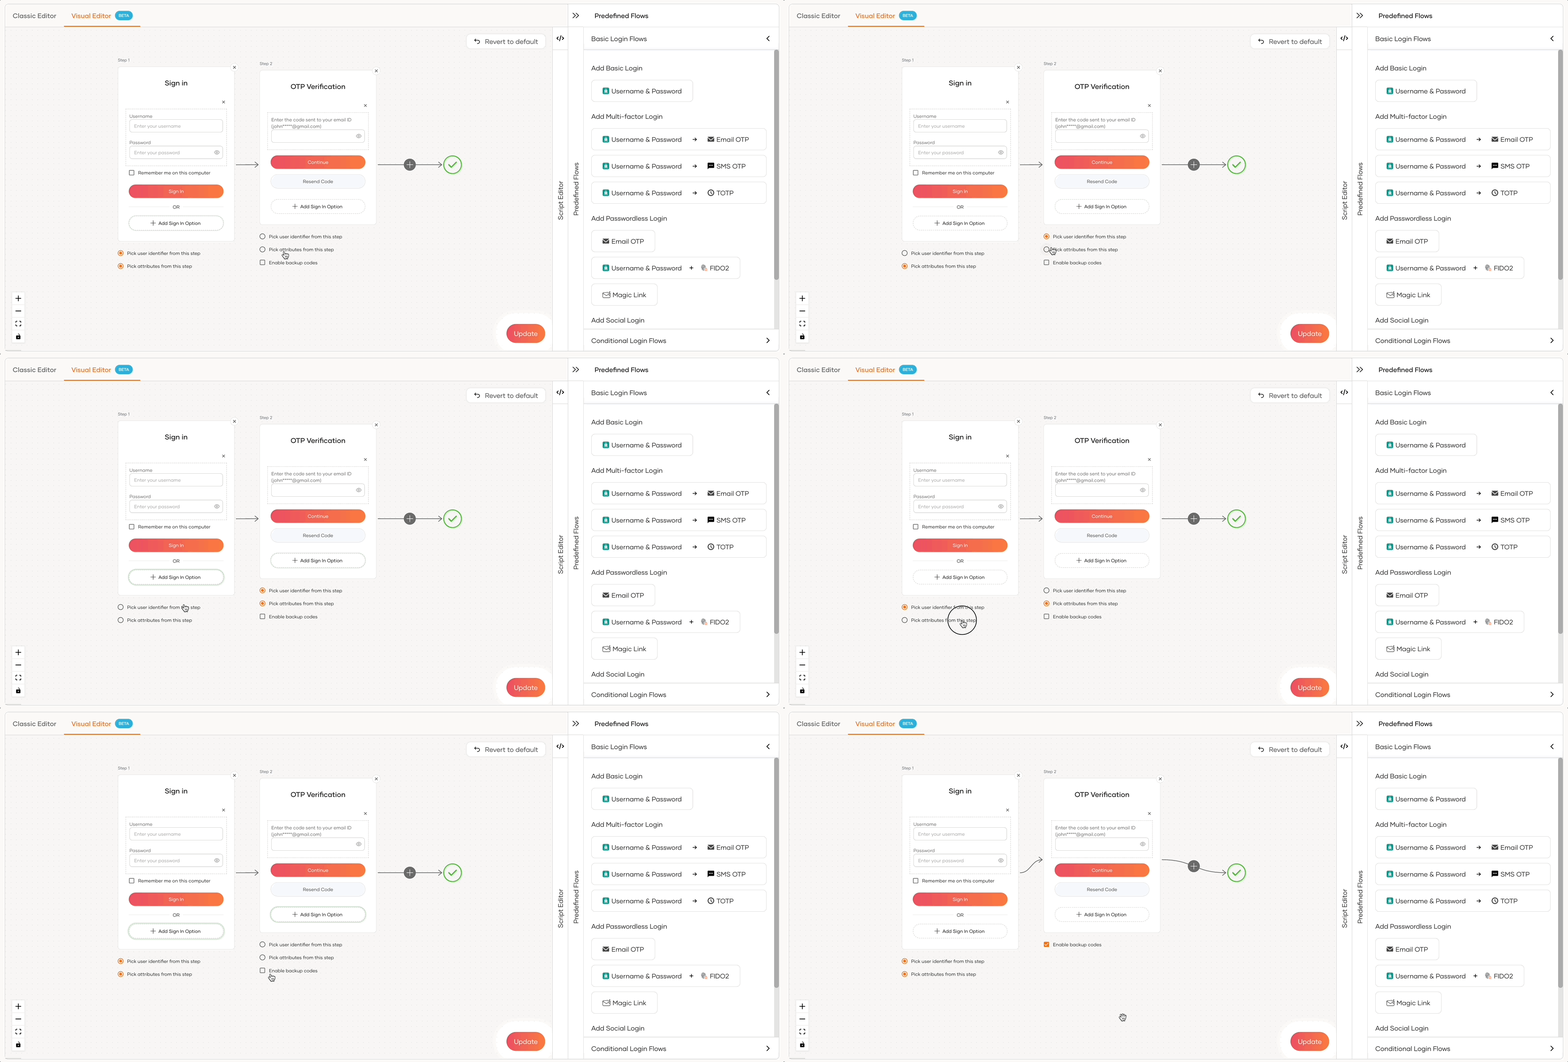
Pick step configurations
There are several configuration options under steps based on their eligibility.
✅ Pick user identifier from this step
If you have configured multiple steps, you can specify the step from which the subject attribute will be fetched. After successful authentication, the sub attribute in the ID token will include the subject ID from the selected step.
✅ Pick attributes from this step
If you have multiple steps configured, you can specify the step from which user attributes will be fetched. After successful authentication, attributes like first name, phone number, etc., in the ID token will be sourced from the chosen step.
✅ Enable backup codes
Backup codes help users log in to applications when they have lost access to the configured multi-factor authentication methods.
💡 This option will only be available for authenticators like SMS OTP, Email OTP, etc.
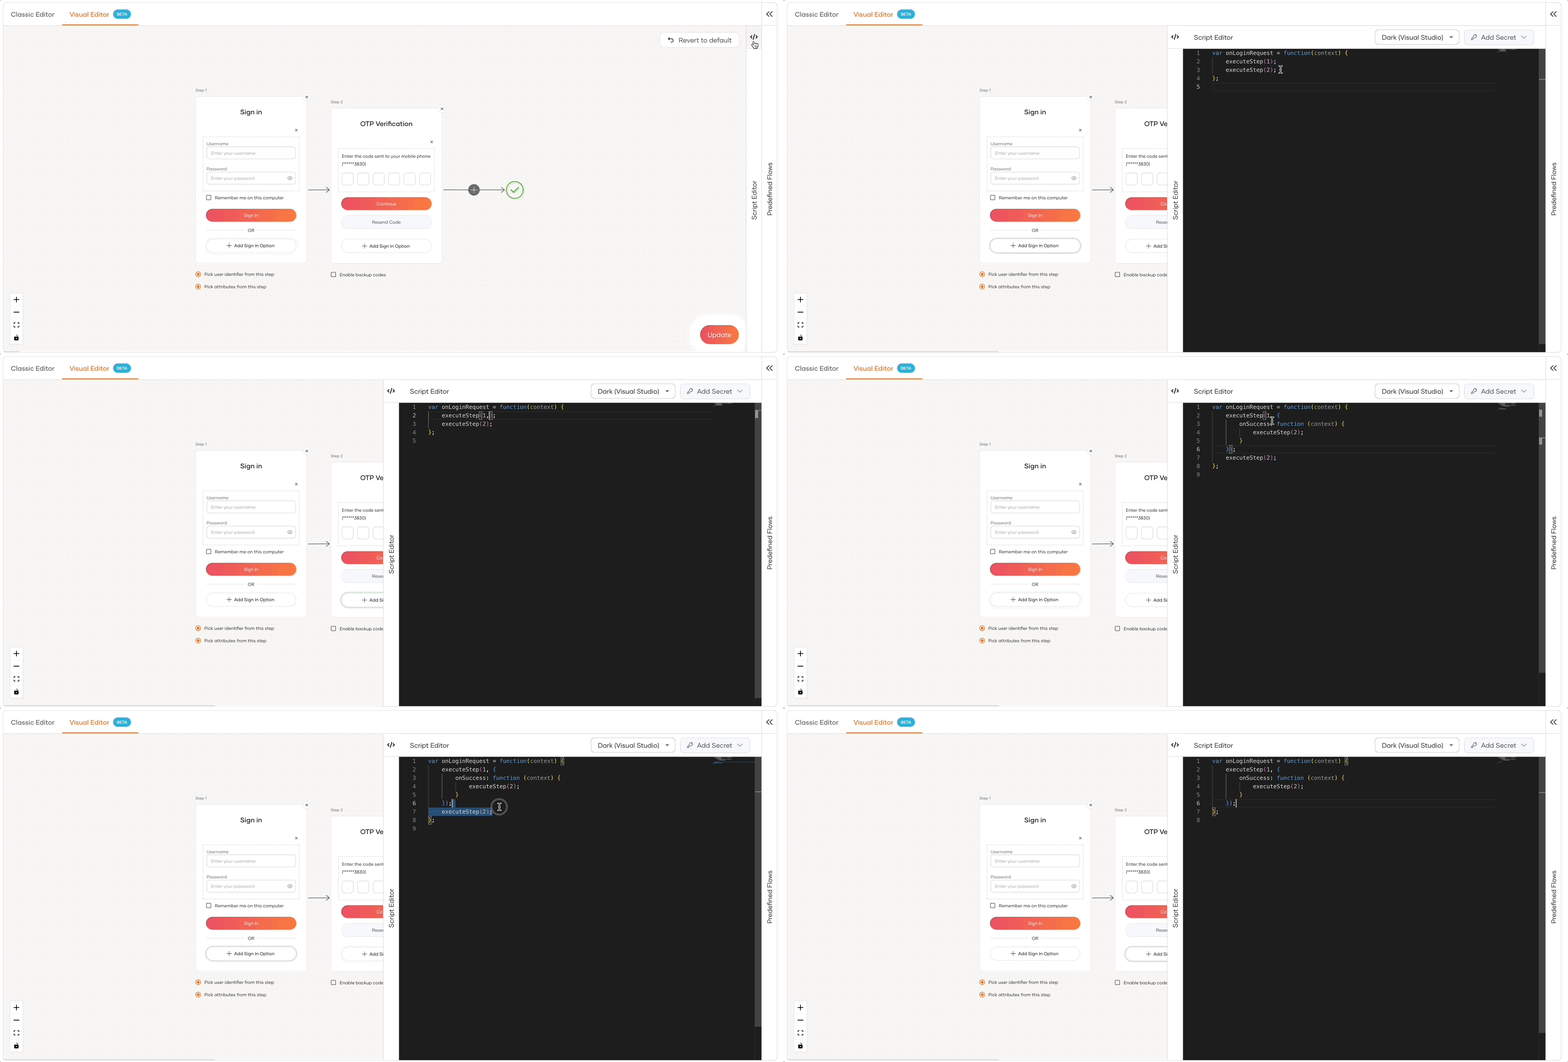
Using the Script Editor
We have introduced a brand new editor with better IntelliSense support for you to write any custom authentication scripts. To start playing around, open up the Script Editor panel.
For more comprehensive insights and detailed instructions on various authentication aspects, don’t forget to check out our documentation and learn about multi-factor authentication, as well as conditional authentication.
I urge you all to check out the power of the visual editor firsthand. If you have any further requests or suggestions, please reach out to the team through Stackoverflow, discord or via asgardeo-help@wso2.com.
Signing off… ✌️❤️